What is Edible Paper & How to Use Frosting & Wafer Sheets
Edible Paper allows you to make amazing bakery-quality desserts on a budget right at home.
It adds an extra element to your dessert creations transforming them from basic delicious treats to exquisite, edible masterpieces.
So in this article, I am gonna guide you through step by step how to use edible paper to make amazing and creative desserts.
What is Edible Paper?
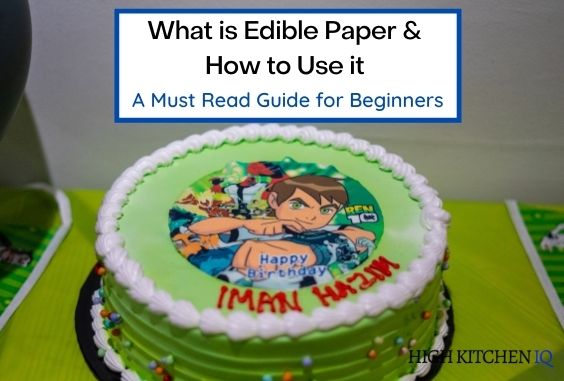
Edible Paper is a paper that is made from sugars and starches, making it completely safe for consumption. It is used along with edible ink and an edible ink printer for the creation of custom images and for decorative edible cake toppers.
Edible Paper can be used on are:
- cookies
- cakes
- cupcakes
- macaroons
- marshmallows
- pies
- cheese cakes
- some variety of fruits e.g strawberry
Types of Edible Paper
Now there are two types of edible paper. They are:
- Wafer Paper also called edible rice paper
- Frosting Sheets also known as Icing Sheets
A Guide to Wafer Paper
Wafer Paper or rice paper is made from a starch-based material usually potato or rice starches with oil and water making it completely edible.
Features of Wafer Paper:
- Usually stiff but transparent. The highest level of thickness of this paper is 0.6 mm.
- This type of paper does not usually have problems feeding in and out of a standard edible ink printer.
- Does not dissolve into the surface of the icing on the dessert.
- Wafer paper has both a smooth and a textured side. The best quality image is achieved from printing on the smooth side of the paper.
- Does not come with removable plastic backing.
- It holds its shape well so it is ideal for accents used on cakes and other desserts as well as cake toppers.
How to Print Edible Toppers from a Printer
To start edible printing you need:
- An Edible Ink Printer
- Edible Paper (Frosting Sheets or Wafer Paper)
- Edible Ink Cartridges
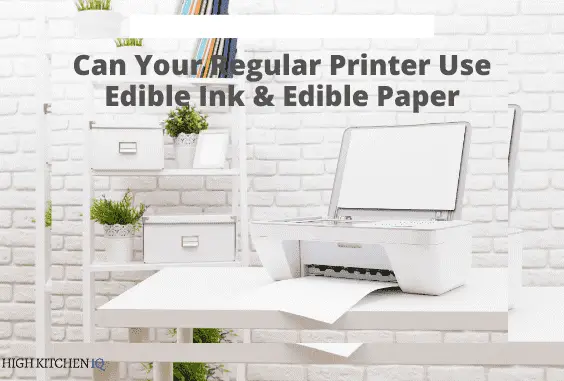
An edible Ink Printer is a special printer designed for use with edible ink. If you are purchasing an edible ink printer you have to buy edible ink that is compatible with the type of edible ink printer you have.
Edible Ink Cartridges are filled with food coloring. If you do a lot of edible printing you should buy refillable bottles rather than keep buying edible ink cartridges.
Frosting Sheets or Wafer paper function in the same way as regular paper would in a printer but they are safe to consume.
Type of Printer To Use For Edible Printing
You can check out the video below for a detailed analysis of the printer you should use for your edible printing.
How to Print Edible Images
- The first thing you need to do is read the directions of your edible printer carefully
- Also ensure you use the edible ink cartridges that are compatible with your printer
- To start you need to pull the plastic cap off of the cartridge
- (If you are refilling the ink take the nozzle and squeeze the bottle into the cartridge by removing the rubber plug on the cartridge)
- Now using paper towel wipe off the excess ink that may bubble from the cartridge
- Next slide the ink into the printer and press down
- Slide your edible paper into the printer like a regular sheet
- Press print
- Now the image on your computer may look slightly different from the printed one.
- You should run the printer once a week to avoid clogging
How to Apply & Use Wafer Paper on Cakes
- The first thing you need to do is bake your cake as desired
- Now allow it to cool completely at room temperature
- Next add your choice of frosting
- Make your choice of frosting is as smooth, flat and even as possible to avoid air bubbles
- Allow your frosting to dry
- Some frostings make a crust so don’t apply the frosting too long in advance before applying the wafer image.
- Carefully open your package of wafer paper or wafer topper
- Cut your topper out carefully or if it already pre-cut handle with care
- Using a food-safe printer brush apply water or sugar paste or edible glue or honey on a piece of wafer paper
- Place it carefully on the cake in the pattern you desire making sure to smooth out any bubbles
- After laying the image on the cake work it carefully from the center out in small circles smoothing out the bubbles until the image is flat in the center smooth the sides down on the image. You can use clean dry hands to do this.
Tips When Cutting out Templates of Wafer Sheets
If you are using Wafer Paper to make a feather, petal, leaves etc chances are you will need a template. Here are some tips you can use to perfect the shape you are cutting out.
- Draw your template out as a mirror image. This is key in making your wafer paper shape the right way when you are cutting out the image.
- Trace your mirror image template on the rough side of the wafer paper. You must use edible food pens or edible coloring paste and a safe paintbrush suitable for the application of edible images.
- Using craft scissors carefully cut out your template ( the paper is extremely fragile so handle carefully)
What Does Wafer Paper Taste Like
Wafer Paper is normally flavorless. Some brands may add a mild vanilla flavor to the paper. Wafer paper dissolves in your mouth.
What Wafer Paper Can be Used For
Wafer Paper can be molded into numerous objects for a sculpted dessert creation depending on your dessert decoration and theme. Some common objects that bakers use wafer paper to sculpt are:
- leaves
- ruffles
- frills
- rosettes
- feathers
- flowers
- butterflies
- ears of bunnies
- wings of birds
- fingernails
What to Look for when Buying Wafer Sheets?
It is important to look for smooth unblemished sheets that have the same shape, size, and color. A slight difference in the color of the sheets can make a lot of difference.
Wafer sheets can be sold as individual sheets as well as 100 count packages depending on the brand. Inspect your product.
How to Store Wafer Sheets?
Store wafer sheets in a cool, dry, and flat place away from heat and sunlight. Once a wafer paper package is opened you should keep unused edible paper in a sealed bag.
Room temperature is usually best. Wafer paper once stored properly usually lasts 2 to 3 years depending on the brand. It is important to read the package recommendations about any food product.
It is also not ideal to store unused wafer paper in a refrigerator since it is highly sensitive to water and moisture. The humidity of the fridge can make it soften and melt together.
Unused edible toppers made from wafer paper is also not recommended for storage in a refrigerator unless specified by the manufacturer as it will affect the quality of the product. The image will most likely fade .
How Long Will Wafer Paper Last once on a Cake?
The answer to this question varies greatly but usually the wafer paper will last for a maximum of 10 days on a cake.
Some factors that determine the longevity of edible wafer products are the type of cake baked, the frosting that the edible image was put on, humidity, and the material of the edible topper. While the image may or may not fade in the refrigerator it will still be perfectly safe to eat.
Experimentation in the kitchen is the best way to discover how long your edible image will maintain its color. My advice to you is to apply the image as close as possible to serving time because we can’t really predict the weather and how the heat or cold will affect the edible image.
Frosting Sheets (Icing Sheets)
Frosting Sheets also called icing sheets are made from sugar or icing and pressed into thin sheets so that they can feed through a printer.
Frosting sheets bond to the frosted surface of the dessert it is applied to and absorb the taste, color, and sometimes consistency of whatever is underneath it.
It is usually thicker than wafer sheets but not as flexible. Frosting sheets are pressed on a flexible plastic backing that then must be removed before placing it on the top of the cake.
Frosting Sheets are best used on desserts where it is not required to be removed before eating because once it is applied to the dessert surface it is absorbed leaving the edible image only.
Frosting sheets when used with edible ink allow the image to have a vibrant and bold color than those printed on wafer paper.
Taste of Frosting Sheets
Frosting Sheets tend to taste slightly sweet and some have a mild vanilla flavor. The taste may differ from one brand to the next. They are soft and dissolve into the dessert so its taste may not be too noticeable.
How to Use Frosting Sheets
It’s a good tip to place your frosting Sheet in the freezer for a couple of minutes before removing the plastic backing and applying it to your cake. This will help the image to be removed easily from the plastic backing.
Video of How to Apply Frosting Sheets
How to Apply Frosting Sheet to Buttercream & Whipped Cream Frosting
- Finish the application of the frosting and other decorations you want to add to your cake.
- Add the edible image as close as possible to serving time as possible.
- Be careful when handling frosting sheets always have clean dry hands.
- Do not remove the plastic backing before printing.
- Place the frosting sheets into the printer with the frosting side up.
- Print your image with the appropriate edible ink and edible printer.
- Allow your printed image to dry for 10 to 15 minutes so that the image can set and not smear.
- If you are cutting out an image from the paper allow it to dry before cutting and do not remove the plastic backing before attempting to cut it out.
- Carefully bend the plastic backing to remove the edible image. Don’t try to peel the image away because that can cause it to tear.
- Apply the image to the cake by carefully lowering it down from the middle outwards
- Smooth out any wrinkles or bubbles with your hand or small roller
- Finish decorating your cake
- Handle with care so as to not perforate the image.
- Store the finished cake in a cake box or cake stand.
- If it is not to be consumed immediately it should be refrigerated especially if whipped topping was used as the frosting base.
How to Apply Frosting Sheet to Ice-cream Cake
- have your cake properly refrigerated in the freezer
- take it out of the freezer and using a spray bottle gently mist the ice-cream to soften the hard surface or rub the surface very lightly with water.
- apply the edible image
- if not being consumed right away refrigerate it until it is ready to be used
How to Apply Frosting Sheets to Royal Icing
- allow royal icing to set completely . if not completely set it may wrinkle when you add your edible image
- Mist the royal icing with water
- apply the Frosting Sheets
How to Apply Frosting Sheets to Fondant & Marzipan
- you can use water or piping gel to lightly moisten the area you want to apply the image
- if it is a small image apply the water/piping gel to the back of the frosting sheet
- gently apply the image to the cake/dessert
How to Apply Frosting Sheets to Ganache or Poured Fondant
- pour your icing as usual
- Apply the edible image before the icing sets
- make sure your icing is leveled or your image may slide off
How to fix Problems with your Frosting Sheets
If your frosting sheet won’t come off of the plastic backing. The most likely cause is that it has some moisture that needs to be absorbed. You can fix this easily by doing one of these things e.g
- Use a table edge to peel the image from the backing. Try lifting the plastic backing by gently pulling it away from the edible image.
- Gently hold the Frosting Sheet at one corner and use a hair dryer to blow dry the sheet in a side by side motion or circular motion. Ensure to put most of the emphasis on the areas that have the most ink. You can do this to both sides of the paper.
- Place the sheet in the freezer for 15 seconds which will release the plastic
If the frosting sheet is too dry and brittle it can jam in your printer. It can be fixed in a jiffy. Try one of these methods
- Sealing it in a zip-lock bag and putting it in the refrigerator not the freezer section
- Take a damp warm paper towel and place it under the plastic backing making sure that the towel does not touch the frosting sheet, then seal it in a zip-lock bag
If your icing sheets tear, don’t worry they are things you can do to make the best of the image even with a rip. While I can’t promise it will be perfect, the image will still be intact.
A big tip is to put your edible image in the freezer for a couple of minutes before trying to remove it this will make the image a little firmer and easier to work with thus preventing future rips. If it does rip try
- Gently rubbing the torn pieces together with dry fingers This will merge the torn pieces while the image may not look perfect . It will no longer have a rip and will be bonded together.
How to Store Frosting Sheets
Frosting sheets should be stored in a tightly sealed zip-lock bag away from direct light and moisture. They usually last for one year. Avoid refrigeration because they can dry these sheets out making them difficult to work with.
Frosting Sheets can be applied to :
- Non-dairy Whipped Cream
- Regular Whipped Cream
- Ice-cream
- Royal icing
- Ganache
- Poured fondant chocolate
- Candy Melts
- Rolled Fondant/Marzipan
Which Type of Edible Paper should you use?
Both these wafer paper and icing sheets come with pros and cons.
Pros and Cons of Wafer Paper
Advantages of Wafer paper
- It is cheaper than frosting (Icing) Sheets
- It is very flexible and holds its shape. It can be molded into different shapes without worrying about it breaking. Ideal for cakes with sculpted designs
- It doesn’t need to be applied to another medium so it is good for use as a cake topper
- Wafer Sheets does not dry out as quick as frosting sheets so it will last longer if stored properly
- Thicker Wafer Sheets are better for use as a stand up cake topper because it holds its shape well.
Disadvantages of Wafer Paper
- The image printed on a wafer sheet is not as bright or bold as one done on an icing sheet
- This type of paper does not usually have a flavor
- The paper may pose some problems when it is in the printer. It may wrinkle or curl when printing.
- It is not easily cut and may have jagged edges so the application to the cake may not be as seamless as the frosting sheet.
Pros & Cons of Frosting Sheets
Advantages of Frosting Sheets
- If you choose to use frosting sheets instead of wafer paper your image will have very bright colors. Its resolution will be very high.
- Frosting Sheets bond well to whatever it is applied to. Dissolving completely into the cake leaving only the image.
- It has a sweet taste
Disadvantages of Frosting Sheets or Icing Paper
- This type of Edible paper is very expensive.
- It is difficult to store for use in a long period. It needs to be in an airtight container and used quickly after use.
- It is not as flexible as wafer paper and difficult to shape.
- Frosting Sheets need to be applied to something eg fondant icing royal icing etc.
- It is too fragile and can break if molded.